


January
2026
A holistic functional dietitian and homesteader shares how to make homemade yogurt and kefir the simple way, in this step-by-step blog post.
In the world of homesteading, few things are as satisfying as creating wholesome, nourishing food from scratch—and dairy is no exception.
Cultured milk products like yogurt and kefir have become kitchen staples in recent years, and for good reason — not only are they delicious, but they offer a range of health benefits like supporting digestive and bone health, reducing inflammation and even healthy weight management.
This article will walk you through the basics of fermenting dairy to create homemade yogurt and kefir.
Whether you have a surplus of milk, are buying raw milk from a neighbor or just want to make the most of a jug from the store, with just a few tools and ingredients and a bit of patience, you’ll be churning out your own tangy yogurt and effervescent kefir in no time. Let’s get started!
What Exactly are Yogurt and Kefir?
Yogurt and kefir are products produced by fermenting milk with bacterial cultures. These bacteria convert lactose (a type of sugar unique to milk products) into lactic acid, which curdles the milk proteins and lends a tangy flavor while extending the milk’s shelf life.
While yogurt relies primarily on fermentation by certain strains of Lactobacillus and Streptococcus bacteria, kefir is fermented using kefir “grains”, which contain a wide variety of bacteria and yeasts.
Both are delicious on their own, or try them topped with fruit and granola, mixed into smoothies, in baking and as a base for dips and sauces.

History of Yogurt and Kefir
The origin of yogurt dates back to Neolithic times in Central and Western Asia, where nomadic shepherds stored milk in animal-skin pouches. The pouches contained enzymes and bacteria that fermented the milk, thereby extending its shelf life. Since then, yogurt has become a staple food across many cultures.
Kefir is believed to have originated in the Caucasus Mountains, where herdsmen stored goat and cattle milk in animal skins. Though legend has it that Prophet Muhammad gifted kefir grains to the people there, the grains likely developed naturally as the milk interacted with the skin in which they were stored. These days, kefir grains are produced commercially and are widely available.
Health Benefits of Yogurt and Kefir
The health benefits of yogurt and kefir are mainly thanks to their probiotic content.
Probiotics are live bacteria that support the gut microbiome, which plays a crucial role in digestion, immune resilience and even mental health.
Yogurt and kefir are both high in calcium and vitamin D, which are crucial for strong bones, teeth and muscles.
They are also naturally lower in lactose, making them a great option for individuals with mild lactose intolerance who still want to reap the health benefits of fermented dairy.
How To Choose the Best Ingredients and Tools for Your Homemade Yogurt and Kefir
Choosing the best ingredients and tools is key to making rich, flavorful yogurt and kefir. Here’s what to look for to ensure the best results every time:
Milk
Cow, goat, sheep and even non-traditional milks like camel and water buffalo make unique and tasty yogurt and kefir. Milk with a higher fat content yields a thicker, creamier product, while milk with a lower fat content yields a thinner consistency.
Yogurt Starters
Store-bought plain yogurt is one of the easiest and most reliable starters for a fresh batch of homemade yogurt.
If you prefer more control over the probiotic strains in your yogurt, look for freeze-dried yogurt starter cultures or probiotic capsules containing Lactobacillus bulgaricus, Streptococcus thermophilus or Lactobacillus acidophilus.
Kefir Grains
Milk kefir grains can be purchased from online retailers, your local health food store or online platforms such as Facebook Marketplace.
Tools
Though kefir can be fermented at room temperature, yogurt requires an incubation temperature between 100°F and 110°F.
There are many options for achieving this, including using an electric yogurt maker, an Instant Pot, a crockpot wrapped in a towel or simply incubating the yogurt in your oven with the light on. You’ll also need a quick-read thermometer to monitor the temperature of your yogurt as it ferments.
See 2025 Holiday Gift Guide: 20+ Gifts For Homesteaders & Hobby Farmers for tips on finding a high-quality yogurt maker.

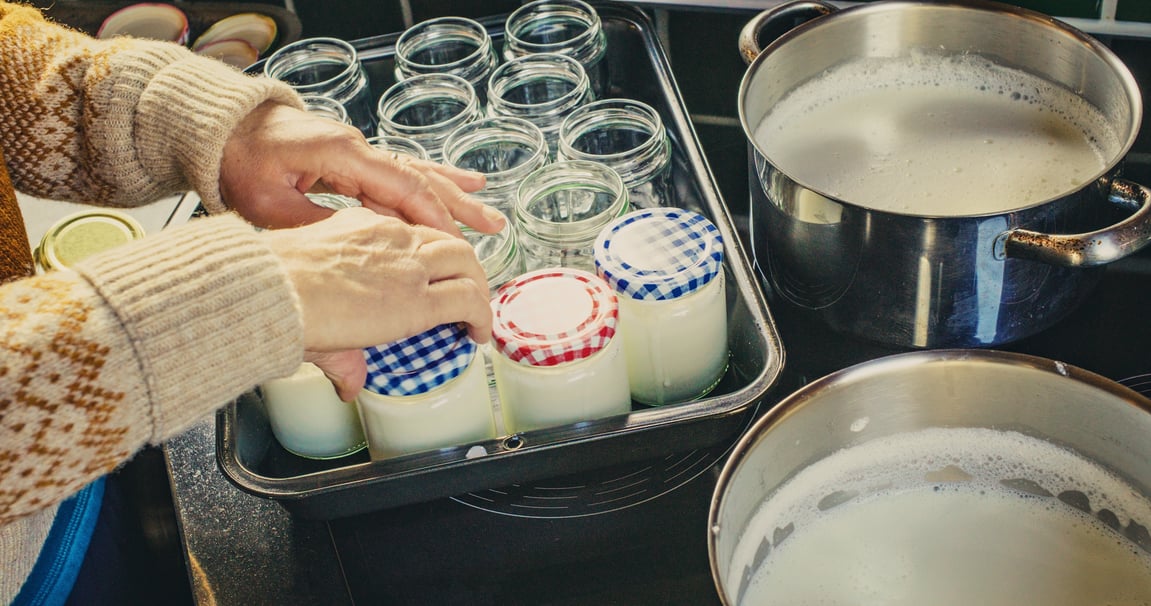
A Beginner-Friendly Yogurt Recipe
Crafting yogurt from scratch is easier than you might think. Now that you have your ingredients and tools, it’s time to start culturing!
Here is a basic yogurt recipe that you can customize to your taste:
Ingredients
- 1/2 gallon milk of choice
- 1/2 cup plain store-bought yogurt or 2 Tbsp. yogurt starter culture
Equipment
-
3-quart or larger Dutch oven or heavy saucepan with a lid
- Whisk
- Spatula
- Instant-read thermometer
- Small bowl
- Mason jars or other storage containers
Instructions
1. Pour the milk into the Dutch oven and warm it over medium heat to a temperature of about 185F. Stir the milk gently as it heats to avoid scorching or boiling over.
2. Remove from heat and let milk cool until it is warm to the touch, around 110F. Stir occasionally to prevent a skin from forming.
3. Scoop out about a cup of warm milk into a bowl. Add the yogurt or starter culture and whisk until dissolved.
4. Whisk the yogurt-milk mixture back into the milk in the Dutch oven.
5. Transfer the newly inoculated milk into the oven (the oven should be turned off with the oven light left on), yogurt maker, Instant Pot or crock pot.
6. Let the yogurt set for at least 4 hours or up to overnight. The longer the yogurt sits, the thicker and more tangy it becomes. If this is your first time making yogurt, start checking it after 4 hours and stop when it reaches your preferred flavor and consistency.
7. Once the yogurt has set to your liking, remove it from the oven. If you see any watery liquid (whey) on the surface of the yogurt, either drain it off or whisk it back into the yogurt. Transfer the yogurt to mason jars, cover and refrigerate.
A note on Greek yogurt: If you enjoy the consistency of thicker Greek yogurt, you can easily make your own by pouring yogurt into a large fine-mesh strainer lined with cheesecloth. Refrigerate for at least 2 hours or up to overnight, then transfer to storage containers. The longer you strain it, the thicker and more concentrated it will become.

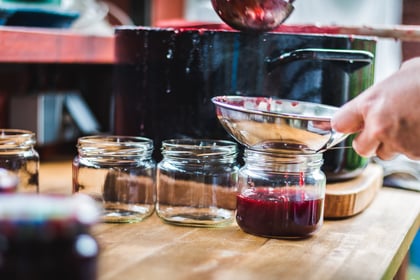
A Homemade Kefir Recipe
Making kefir is as easy and rewarding as it gets. If you want a refreshing drink that will also boost your gut flora, look no further than this recipe!
Ingredients
- 1 quart milk of choice
- 2 tsp milk kefir grains
Tools
- Quart mason jar
- A piece of cloth
- Rubber band
- Fine-mesh strainer
- Wooden spoon
Instructions
1. Add kefir grains to a mason jar.
2. Fill the jar with milk, leaving about 2 inches of space at the top
3. Place a cloth over the top of the jar and secure it with a rubber band.
4. Leave the mixture on the counter for 12 to 48 hours, depending on how thick and sour you prefer. If this is your first time making kefir, start tasting at the 12-hour mark and stop when it reaches your desired taste and consistency.
Troubleshooting Tips for Homemade Yogurt and Kefir
Making your own yogurt and kefir at home can take some trial and error, especially as you experiment with different types of milk and the time and temperature for culturing. Don’t be discouraged if your first few batches aren’t perfect!
If your yogurt or kefir is too sour:
Try a shorter culturing time.
If your yogurt or kefir isn’t sour enough
Try a longer culturing time or use a slightly higher temperature. If you’ve cultured your yogurt or kefir at the recommended time and temperature and it doesn’t taste sour at all, you may need to discard the batch and try again using a fresh starter.
If your yogurt is too runny
You may need to use more starter culture or let it culture for a longer time or at a slightly higher temperature. To save a runny batch, consider straining it or adding a thickener, such as pectin, gelatin or powdered milk.
If your yogurt is lumpy
Use either a commercial yogurt starter or one that is no older than 1 week. Also, avoid disturbing your yogurt while it ferments.
Bringing it all Together
Making your own kefir and yogurt isn’t just about stretching your dollar or avoiding store-bought food; it’s an act of self-sufficiency in a world that leans heavily on convenience.
Whether you're using milk from your own animals or supplementing with what’s available locally, culturing dairy at home allows you to nourish your family with wholesome, probiotic-rich food.
Once you get the hang of it, these fermented favorites are sure to become staple parts of your daily rhythm. Happy culturing!
References
1. Yogurt, cultured fermented milk, and health: a systematic review2. Therapeutic potential of popular fermented dairy products and its benefits on human health


Your email address will not be published. Required fields are marked*