


July
2025

Are you sourdough-curious? Then check out this detailed tutorial from a dietitian on how to make sourdough bread at home with just water, flour and a bit of patience.
Have you been dreaming of baking your own crusty sourdough bread at home, but feel intimidated by the process?
Whether you’re a seasoned home baker or a total beginner, this post will guide you through every step of creating your own tangy, golden-brown loaf of sourdough. All it takes is water, flour and a little bit of patience!
What is sourdough?
Sourdough bread relies on the fermentation of the dough by wild yeasts and bacteria for its leavening and characteristic tanginess.
As these microorganisms feed on the naturally occurring sugars in the flour, they produce lactic acid and gas bubbles, imparting a sour flavor, as well as texture and lightness, to the finished bread.
Although the end result can be less predictable compared to bread baked with commercial bakers’ yeast, this unique process lends a depth of flavor that is unparalleled.
A Brief History of Sourdough
Before the twentieth century and the advent of commercial bakers’ yeast, most breads developed their flavor and rise thanks to wild yeast.
Sourdough is considered one of the most ancient leavened breads, with its roots in ancient Egypt, where it was likely discovered by accident after dough was left out and colonized by wild yeasts.
From these humble beginnings, sourdough has spread across the globe and become a staple in cultures worldwide.
These days, sourdough has been enjoying a resurgence of popularity in part due to the pandemic lockdowns during which people were embracing rewarding creative outlets, slower living and home cooking.
Health Benefits of Sourdough
When it comes to health benefits, sourdough bread stands tall compared to commercial loaves made with baker’s yeast.
Its natural fermentation process alchemizes the structure of bread, breaking down gluten and FODMAPS (difficult-to-digest carbohydrates), enhancing antioxidants, reducing the glycemic index and unlocking nutrients like B vitamins, folate and other minerals.
These qualities can make sourdough a great option for individuals who are sensitive to gluten or have digestive issues like IBS, those who need to manage their blood sugar levels or those seeking a more nutrient-dense loaf.
Creating your Sourdough Starter
The sourdough starter is the heart of every sourdough recipe. This simple slurry of flour and water captures wild yeast and bacteria from its environment, transforming into a bubbling, living culture that is effectively used to “seed” the dough of each loaf.
Seasoned sourdough bakers often name their starters and care for them with the same attentiveness as they would a pet, sometimes maintaining them for decades and even through generations.
For newcomers to sourdough baking, though not required, pinching a bit of an established starter from a friend or purchasing a ready-made starter can help ensure that the starter establishes more quickly and with less room for error.
Another way to speed up the introduction of yeasts and bacteria into the dough is to drop a few pieces of unwashed, organic whole fruit (such as berries, grapes or plums) into the starter, then strain them out once the starter has begun to bubble.

Supplies
- Unbleached all-purpose flour or bread flour
- Filtered water (chlorinated water can inhibit fermentation)
- A kitchen scale, for accuracy
- Sourdough starter, optional
Instructions
- Whisk 1/4 cup flour with 3 tablespoons of filtered water in a small bowl. If you have a bit of established starter (or want to drop in some fruit), mix that in too.
- Pour the mixture into a 2-quart glass jar with a loose-fitting lid and let it sit at room temperature for 12 hours.
- Return to the jar and vigorously whisk in another 1/4 cup of flour and 3 tablespoons of water. Cover the jar and let it sit at room temperature for an additional 12 hours.
- The next day, discard half of the starter, then vigorously whisk 1/2 cup flour and 1/3 cup of water into your starter.
- Continue discarding half, then whisk 1/2 cup flour and 1/3 cup water into your starter twice daily until it begins to double in volume within 12 hours of each feeding. Most sourdough gurus recommend continuing this process for up to 14 days to ensure a strong starter.
Once your starter doubles in size with each feeding, you can begin baking sourdough bread and other baked goods.
Either bake with it immediately, or transfer it to the refrigerator (this slows down microbial activity and prevents it from overflowing its vessel).
Feed the starter 1 cup of flour and 2/3 cup of water at least twice a week, or each time you bake, to keep it alive.
To wake your starter back up after refrigeration, feed it with 1 cup of flour and 2/3 cup of water and allow it to sit at room temperature until it doubles in volume (about 12 hours). Remove the amount of starter the recipe calls for and return the rest back to the refrigerator.
Note: Sourdough “discard” can be used in many recipes, including pancakes, pizza dough, scones, pie crusts, pretzels and more!
Turning Starter into Sourdough
Now that your starter is mature, it’s time to bake!
There are tons of sourdough bread recipes available online, varying in complexity and time commitment. Below is a beginner-friendly recipe that requires minimal effort.
Ingredients
- 1/4 cup (50g) active sourdough starter
- 1 1/3 cups + 2 tablespoons (350g) water
- 2 teaspoons (10g) fine sea salt
- 4 cups + 2 tablespoons (500g) bread flour
Supplies: kitchen scale, mixing bowls, Dutch oven with cover

Instructions
- Mix the dough: In a large mixing bowl, stir together 50g of active starter and 350g filtered water until blended. Add 500g of bread flour and 10g of sea salt, then use your hands to mix the ingredients into a shaggy mass. Cover the bowl and let the dough rest at room temperature for 1 hour.
- Stretch and Fold: Wet your hands with a bit of water to prevent sticking. Pick up the dough on one side and stretch it over itself. Turn the bowl a quarter turn and repeat until you have turned the bowl in a full circle. The dough should form into a tight ball. Cover and let rest for 30 minutes, then repeat the same stretch and fold process one more time.
- Bulk Fermentation: Cover the bowl with a tea towel and let the dough rise for 7-10 hours at room temperature, or until it has doubled in size, approximately 50-75% of its original volume.
- Turn the dough out onto a lightly floured surface and gently shape it by pulling the sides into the center of the ball. Center the ball on a piece of parchment paper and use it to transfer the ball into a medium-sized bowl. Cover the dough with a tea towel and let it rest for 1 to 2 hours at room temperature.
- Thirty minutes before you’re ready to bake, place the covered Dutch oven into the oven and preheat to 450°F.
- Once preheated, remove the hot Dutch oven and remove the lid. Score the top of the dough with a razor or sharp knife, then use the parchment paper to transfer the dough into the Dutch oven. Place the lid back on the Dutch oven and return it to the oven.
- Bake for 20 minutes. Remove the lid and bake an additional 25-30 minutes or until the crust is golden brown.
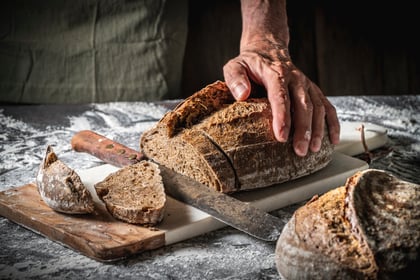
- Transfer the baked bread to a cooling rack and let it cool for at least 2 hours (or up to 24 hours) before slicing. The bread will continue cooking during this time; if you cut into it too soon, it will have a gummy texture.
- Slice and enjoy your homemade sourdough loaf!

Sourdough Bread Troubleshooting
Troubleshooting your sourdough requires a combination of intuition, finesse and science, as there are many variables that can affect your bake.
Small changes in timing, temperature and the health of your starter can make a big impact on the finished loaf.
Sourdough Starter Troubleshoot Tutorial
Problem: Your sourdough starter won’t rise
Solution: Starters thrive in warm environments (ideally between 75-85°F). Try placing your starter in a warmer location, such as a cabinet or proofing box. You can also use warm water in your feedings.
Problem: Your starter was bubbling, but then it stopped
Solution: The process of making a starter can be unpredictable. Continue feeding your starter and be patient. Feeding the starter twice daily (every 12 hours) can also boost yeast activity.
Problem: There is a dark, smelly liquid on top of the starter
Solution: This liquid is known as hooch, and is an indication that your starter needs to be fed. Simply pour the liquid off and feed your starter right away.
Troubleshooting the Dough
Problem: The dough is taking forever to rise
Solution: First, make sure you are using a strong starter. If so, you may need to move your dough to a warmer part of your kitchen or use a bread proofing box to ensure good microbial activity.
Problem: The finished loaves are either dense and gummy or have huge air pockets.
Solution: These are usually symptoms of under-proofed dough. If your starter is weak, you may need to feed it for another week or so. Once it is time to bake, try extending the bulk fermentation time and finding a warmer spot in your kitchen for the dough to rise.
Problem: The loaf deflates when it is scored
Solution: If the loaf deflates like a balloon when it is scored, this indicates that the dough has been over-fermented and/or over-proofed. Reduce the proofing time and try moving your loaf to a cooler part of the kitchen.
Making your own sourdough bread at home is a rewarding and delicious journey that will connect you to a timeless baking tradition. With just flour, water, patience and practice, you’ll soon be creating flavorful and crusty loaves that rival any artisan bakery.
So grab your starter, preheat the oven and enjoy the satisfaction of baking sourdough from scratch!
Looking For More Homesteading Recipes?
Check out the following articles to help round out your homesteading culinary skills:
- Cooking Without Power: An Introduction To Dutch Ovens
- 9 Healthy Benefits Of Eating Wild Game
- 7 Easy Ways To Preserve Food (no canning required)
- Make Good Use Of Late Garden Produce With This Veggie Tonic
- The Ultimate Guide To Bulk Buying Groceries In The Country


Your email address will not be published. Required fields are marked*